In order to set the mood for this project, which I originally finished in 2020, I want to tell you a small story. Don't worry, the nerdy stuff will come later.
In summer of 2020, we all were still getting used to living in a pandemic. With contact restrictions in place, having any form of social life was tough. Back then, I lived in a very sociable dormitory, where we tried to keep the communal spirit alive with online game nights and mutually shared door-delivery cooking.
One of my good friends took it upon himself to lighten the mood by planning a multi-day-treasure hunt across the dorm premises for all residents. He acted as the mysterious anonymous game master, sending cryptic instructions to the dorm mailing list, leaving us all guessing who the creative mastermind was that sent us all searching for more clues for almost a week. Long story short: it was amazing, it was creative, it was inspiring. Each one of the puzzles he came up with could be a blog post here, and the fact that it kept dozens of rather bright people busy for a handful of days speaks for itself. He pretended to be one of the unknowing participants before finally revealing himself when the last puzzle was solved.
When autumn came around and my friend's birthday approached, we knew we wanted to pay him back somehow. After some thought, we ended up with the plan to reverse his game: we got everyone in the dorm involved to create a treasure hunt just for him. For a whole afternoon on his birthday, my friend had to run around the premises, knocking on countless doors, being greeted by people in costumes who gave him puzzles to solve and clues to collect while the others watched on a live stream. We crafted a working combo safe out of cardboard, we 3D printed puzzles, we drew treasure maps on doors in blacklight ink, we wrote poems filled with math riddles, and so much more. I think he liked it.
Both of those events were some of my highlights in an otherwise difficult time, and I don't think I could recreate that spirit now if I tried. I think those events prove that people can somehow get closer in times of separation. To me, they also show what memorable experiences creative people can produce when the world leaves them be for a while.
Let's get to the main topic though. This post is about one of the riddles I tried to create for our treasure hunt. And for the observant readers among you: see if you can spot the elephant in the room that I did not notice until late into the project.
When ideas strike
Back in that time, I was reading Gödel Escher Bach. Though I never finished it, the book definitely inspired some novel ideas in me. One of the ways it did was through its cover.
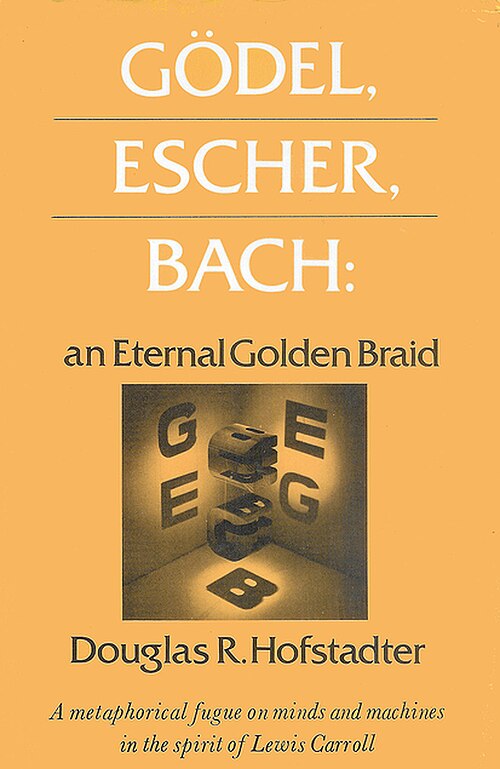
The cover of GEB. Source.
.jpg)
When looking at the three-way shadow projection of the letters, I immediately wanted to do something with that idea. Coincidentally, I had also just spent an hour designing a QR code for something unrelated. It took a moment, but when the two lonely neurons in my head finally connected, an idea was born: Why not create a three-dimensional QR cube that resolves to three different QR codes when looked at from each side? Wouldn't that be a perfect puzzle for someone like my friend?
I searched online for 3D QR codes and QR cubes, but all I found was single QR codes 3D-printed on things, or QR cubes that kind of did the job, but had no sense of an illusion to them. That was not what I was looking for. Searching for QR code shadows actually got me really close: I saw an art project from Drzach and Suchy in which they used small sheets of plastic arranged in a cube support structure to create the multiple-shadow effect. However, their implementation felt a little bit like cheating. By using thin sheets that vanish when observed from another side, they took away the three-dimensionality of the illusion that made the GEB cover page so intriguing.
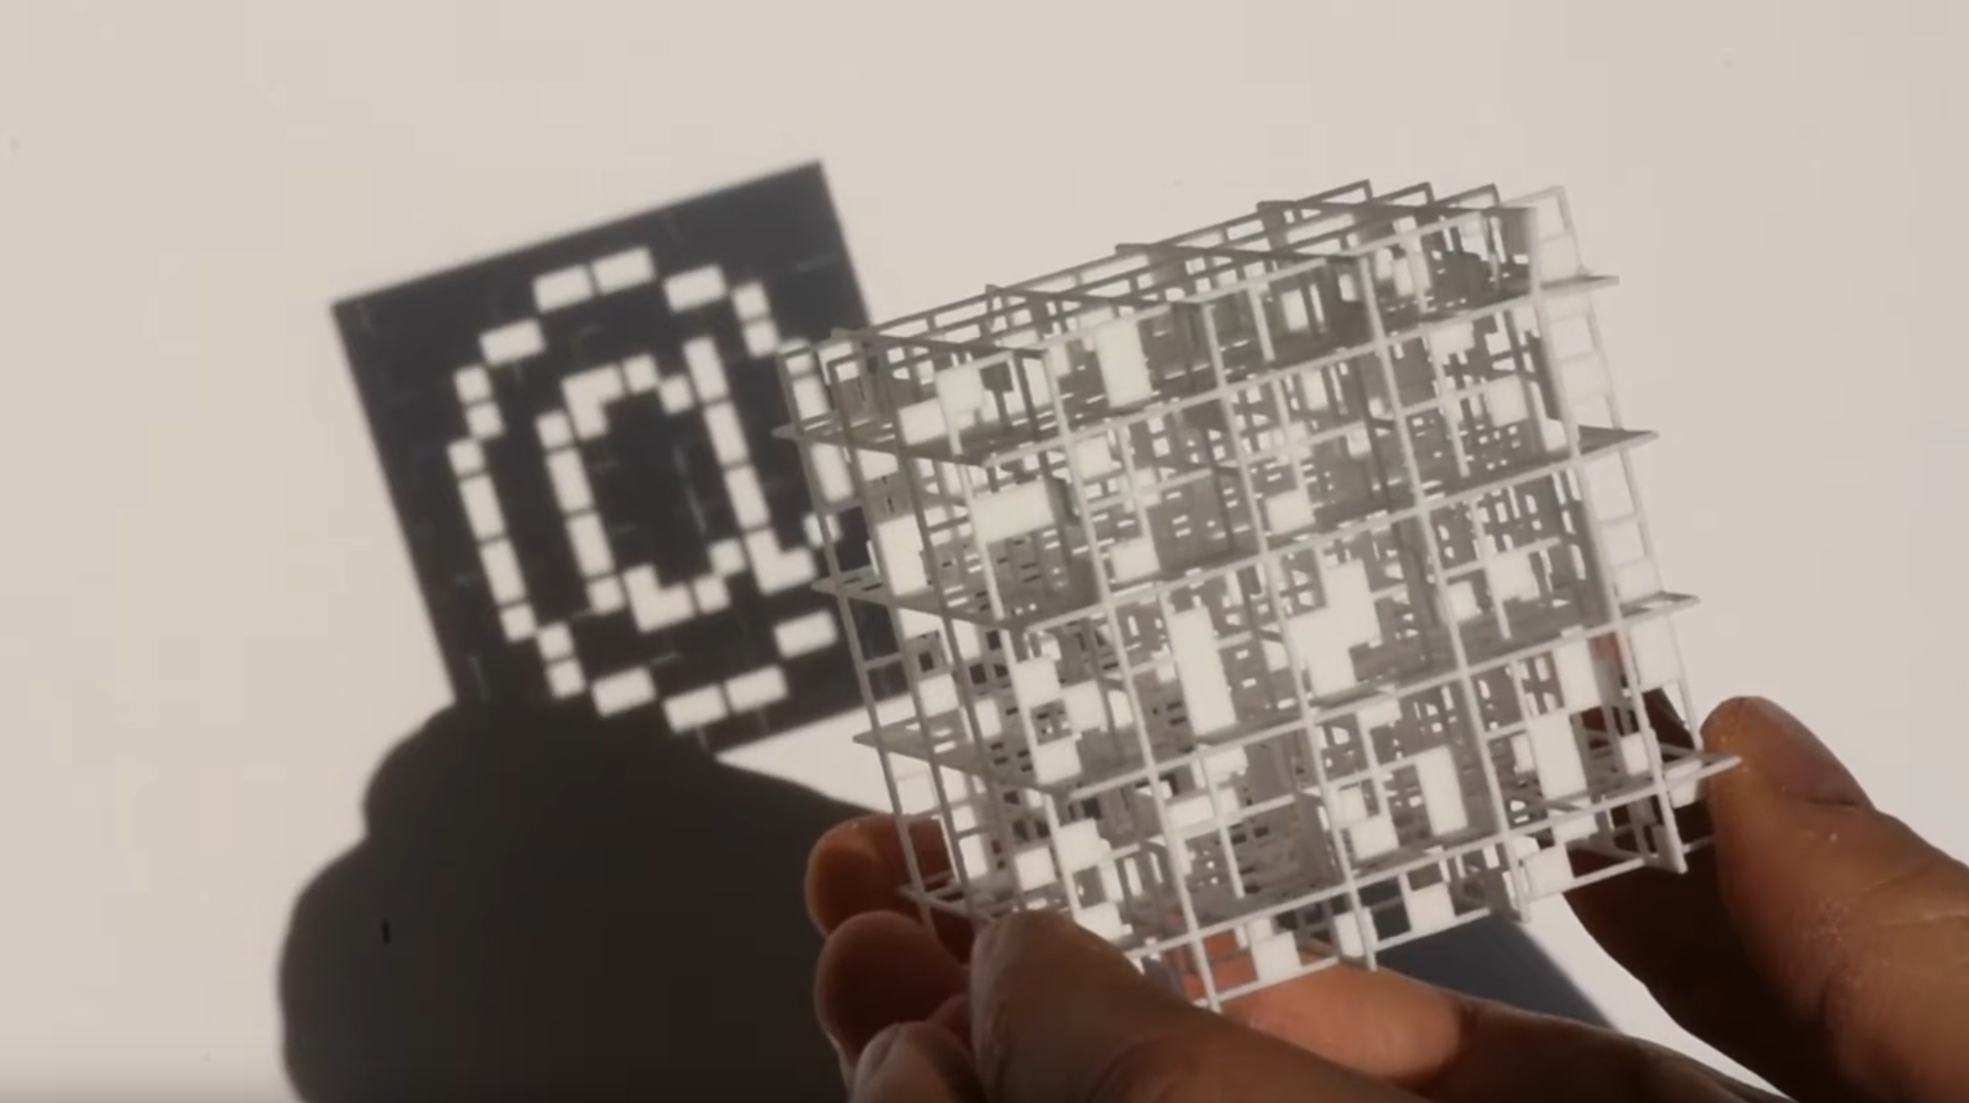
Drzach and Suchy's implementation using thin sheets. Source.
With no clear existing implementation in sight[1], my plan was set: create a multi-perspective illusion with three QR codes while keeping the three-dimensional "magic" of the entire structure alive. The way I approached it was by going up a dimension - from pixels to voxels.
Let's code
I had about a week left to find out whether it was possible to make such a product, to code something that actually made it, and to turn it into a real thing somehow. After some mental 3D gymnastics, I was convinced that it must be possible to find a decent enough representation of voxels in 3D space that resulted in three individual QR codes when looked at from each side. And anyway, the best way to find out if it's possible is to try. Therefore, I quickly proceeded to the how. My first thought was to come at it from the simplest angle. I "only" had to place the voxels at the right spot in 3D space so that its projection from all three sides lined up with a "dark" pixel on the three QR codes, right? Here was the resulting plan:
- start from an empty 3D field
- turn the three QR codes into an array of 1s (pixel) and 0s (no pixel)
- project each QR code array onto one of the three cube faces
- for each 1 in the first QR code, see where it could be placed in the depth-coordinate by looking at where the projection of the second and third QR code have 1s as well
Easy, right? Well... I spent an hour rotating cubes in my head, mumbling "top left of side one... rotate upwards... bottom left of side two... rotate left... bottom right of side three", and trying to figure out which of the indices ([x, y, z]) from one side corresponded to which other index (e.g. [x, z, -y] and [z, -x, -y]) in the projection from the other two sides. It took a while before I finally had all the coordinates untangled and re-tangled into a beautiful implementation nested for loop.
[...]
# QR 2 (XZ Projection)
# i = x, j = z. Find a suitable k = y.
for i in range(dim):
    for j in range(dim):
        if QR2[i, j] == 1:
            # Find all y-coordinates (k) where QR1[x, y] and QR3[y, z] are both 1.
            a = np.intersect1d(np.where(QR1[i, :] == 1), np.where(QR3[:, j] == 1))
            if len(a) == 0 and np.sum(cube[i, :, j]) == 0:
                impossible_voxels += 1
            elif len(a) > 0: # there is a possible place
                # Randomly place a voxel in the range of choices
                cube[i, np.random.choice(a), j] = 1
[...]
Despite the ugly code, I was actually happy with the results from this first version:
The cube only had two minor downsides: first, it almost always contained errors (as you can see from the impossible_voxels variable in the code), and second, this method still resulted in many redundant voxels.
Regarding the errors, it turns out that the 3D-ification can lead to random impossible voxels that just can't be placed in space (unless you are lucky and your QR codes line up). If you want to place a voxel somewhere along one axis, but the other two QR codes do not have any matching dark pixels left along that axis in their specific projection, you're just out of luck. I noticed that I could sometimes overcome these issues by just rotating one of the codes by 90 degrees and hoping that randomness would now be on my side. However, it turns out that there is an easier solution: just ignore it. QR codes are designed to carry additional redundant bits that can be used to reconstruct the original information even if some of it is corrupted. Depending on the code, up to 30 % of all bits can be randomly screwed up without any loss in useful information. That's why companies can put their logo in the center of a QR code without destroying it. So the only question I had to check before being able to ignore it was whether I hit that 30 % limit.
Turns out: I wasn't even close. I usually ended up with 1-5 errors in a 25x25x25 array of voxels. Here is an example comparison of three QR codes against the projections of their 3D cube from my method:
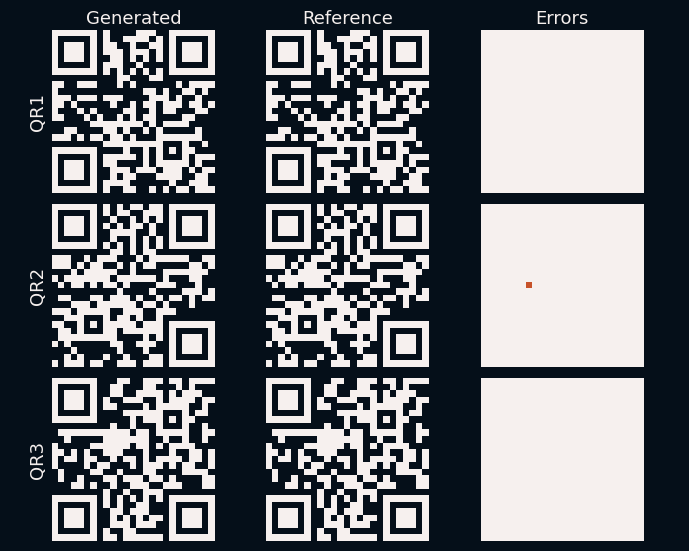
Perfect. This just leaves the redundancy issue. The voxels were placed with no regards to whether they actually needed to be placed at all, or whether they actually were already covered by other voxels. To fix this, I could add some logic to the previous code, but I decided to add a second step instead, in which all previous redundancies were removed. There is probably a perfect solution to this, but I went with the 98% version:
- go through all of the cube's 1s in random order
- see if there are other 1s in the same row, column and "slice" (third dimension)
- if so, it is already optically covered from all sides and can be removed
- continue until no more redundancies are found
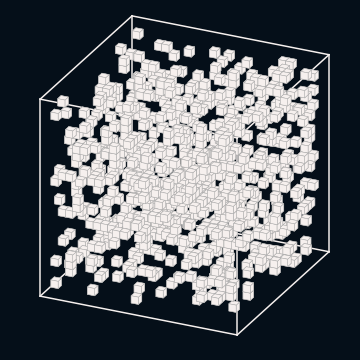
The random order was needed in order not to thin out one corner of the cube while leaving the opposite corner packed. Applying this to my 25x25x25 QR cube reduced the number of voxels by another 48 %. The resulting 3D cube finally looked like what I had envisioned:
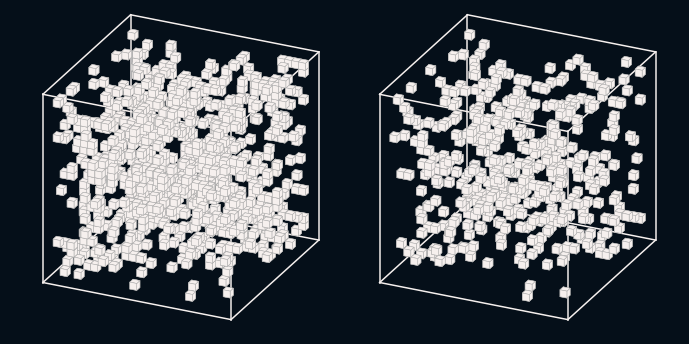
The same cube before and after redundancy removal.
At this point, I realised that I had missed an even easier method of constructing the entire cube. Instead of adding voxels where they are needed, I could just start from a filled cube and remove voxels where they are not needed. Just like the joke about Michelangelo's David goes:
"How in God’s name could you have achieved a masterpiece like this from a crude slab of marble?"
"It was easy, all I did was chip away everything that didn’t look like David."
The rules are far simpler than before:
- start with a cube of 1s
- look at each zero in the three projected QR cubes and "punch a hole" of zeros through the entire cube to make sure that there is nothing blocking it from this side
- remove redundancies just like before
The method starts out with far more redundant voxels, but the final cleaning step takes care of it either way, and it saves you from having to go through the annoying index-projection-fiddling I described before. Here's a visualisation of the method before and after the redundancy removal:
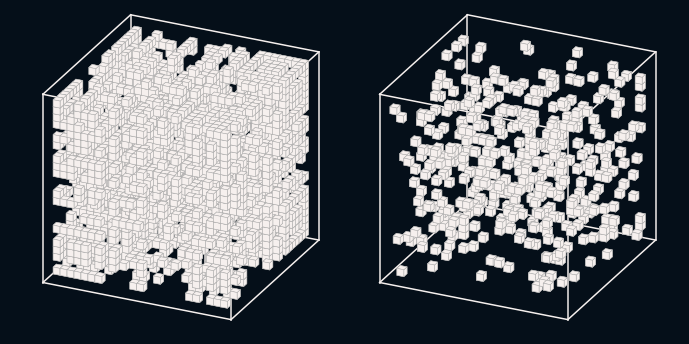
Like David from a marvel block. Only a little more profound.
Both methods give comparable (but different)[2] results. And the illusion ended up working really well! Here are two videos showing what it looks like when you just randomly look at the cube, and when you look at it directly from one side:
This looked very promising, exactly like what I had hoped. I pointed my phone at my screen and was delighted: the QR codes worked perfectly. After staring at the animations for a while, I also had another idea: Why am I limiting myself to QR codes? Any binary (black and white) image could be displayed this way, right? With a few more lines of code, the next version was born:
Bonus points if you recognize these three gentlemen. The cube is > 97 % empty at this point.
I had to scale up the resolution of the cube to at least 80x80 pixels to get recognizable images, but I loved the outcome. Even better, it opened up more ideas about how to utilise the concept - maybe even make a product out of it? The world's most overkill business card with your company logo on one side, a QR code to your website on the second, and your contact details on the third? Why not! A corny valentine's day gift with the name of your chosen one, a heart emoji, and a QR code to "your song"? I mean... good luck, but sure! The illusion surely would get some people interested, even more so if the hidden information was scannable by just pointing your phone at it.
But I was getting ahead of myself. With the proof of concept out of the way a few days left before the birthday surprise deadline, I decided to leave the virtual world and figure out how to bring my first QR cube into reality.
From voxels to blocksels
I had three basic ideas of how to build the cube:
- 3D print it
- use epoxy resin with some sort of mold
- laser engraving it into a glass block
The main issue with 3D printing would be the visible scaffolding, though perhaps that could be overcome with transparent filament? I could avoid the entire issue if I used transparent epoxy resin and somehow was able to position the voxels inside. But how on earth do you manufacture that? 3D lasering the voxels into a glass cube sounded cool, but was probably the most expensive option and definitely exceeded my time budget. Besides, I didn't even know whether a phone could pick up the low-contrast QR code in the glass.
I decided that it was best to start with a regular 3D print and see how (un-)usable it was. I didn't have transparent filament, but maybe the code would still be readable if the scaffolding was thin enough? And if I couldn't scan it directly, then maybe at least I could fall back to casting a shadow with a strong light source? Again, no way to find out except just doing it.
Now... I told you at the start of this post that there's an elephant hidden somewhere. Well, this is where I first met it. It is subtle, as elephants often are, and still obvious in hindsight. Maybe you already figured it out as well. If not, I won't spoil it until later.
Idea, meet physics
I decided to print a small test cube with an edge length of around 2.5 centimeters (1 inch). The result was pretty much unusable, as the scaffolding was just way too massive compared to the gaps. With only two days left, I doubled the size, prayed, and printed again.
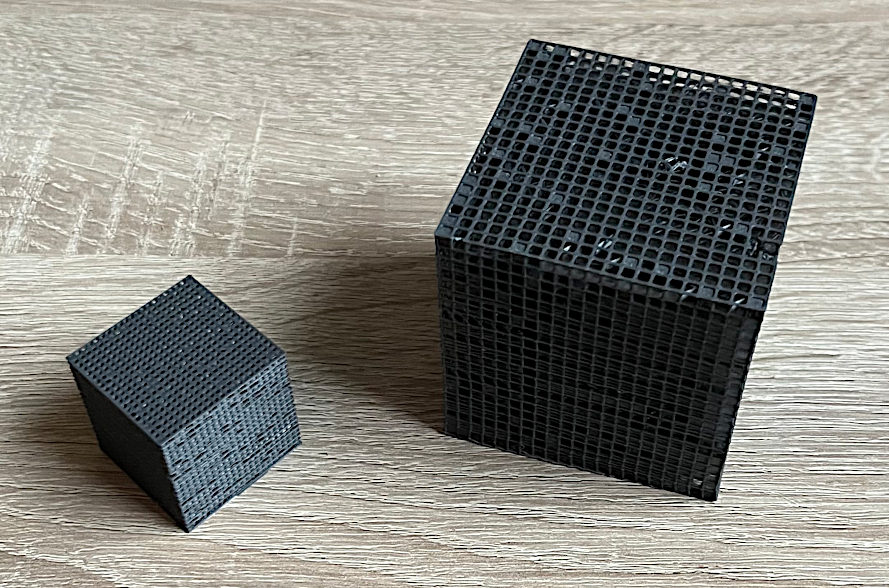
Mr. Cube Senior and his son.
As you can see, the print quality was not optimal, and the scaffolding still dominated the view. Pointing my phone camera at it did absolutely nothing, and even getting a clean shadow out of it with a flashlight turned out impossible. The only thing that kind of worked was holding the cube against the bright sky and looking at it from the other side:
If you look at the video, you can clearly see the QR code. Unfortunately, you can also see the elephant. At this point, you probably guessed what the issue is. I first saw it when exporting my cube to a printable format and opening it with another software. Suddenly, everything looked a bit... off. If you're still not sure what I'm talking about, I'll just show you. On the left side of the following video, you see the animation generated from my code. On the right side, you see what it would actually look like in reality.
Ahh yes, of course.
Perspective. That's the reason why everyone always just used shadows, and with rectified light sources I am sure. This unfortunately ended my dream of making a beautiful transparent cube with easily visible hidden messages in them (unless I wanted to use some sort of warped lens surfaces on the glass cube - and good luck shooting an accurate laser through those).
This, unfortunately, was a physics problem. And from what I learned, those are usually quite hard to overcome.
A slightly disappointing end
I ended up not using the cube for the birthday treasure hunt. I showed it to my friend the next day and we had fun discussing other ways of getting around the issue of perspective. Still, we could not come up with any solution that did not involve shadows. The printed cubes now sit on my coffee table and stare at me, judgingly. They do still serve a useful purpose though. Whenever a guest sees them asks what they are about, the expression on their face a minute into the story acts as a great filter for finding out how nerdy they are.
Years later, when writing this text, I decided to reconsider the idea of laser engraving the voxels into a glass cube. I sat down to sketch out a real product based on the shadow idea and approached a small shop that offered customised engraved glass sculptures. The person working the laser definitely passed the aforementioned nerd-filter, and he was excited to create a cube for me. Unfortunately, he also told me that I had to write the appropriate code for their industrial laser in order to make this happen.
That did not seem like something I would do on the weekend.
So... this is where I stand today. The idea has continued to roll around in my mind for years now, and I would be sad if I never tried creating at least one cool lasered 3D illusion cube. I'm sure that I will someday.
If you have any cool ideas regarding this topic, if you want to build or buy one of these cubes, or if you want to steal my idea and build a cube business empire, let me know. In my opinion, the idea is too interesting to end here.
Footnotes
[1]: When writing this text a few years after the project was done, I also did some more research and found out that I had missed some other similar implementations of shadow art. I purposely do not research too much during these fun projects in order not to kill my motivation when I see other people doing similar work. Still, I now found out that some implementations like the one from this video from Siggraph Asia 2009 do show a similar effect. I also came back to my old notes in 2025 and found out that Aleksey Tikhonov, whose article about mirrored QR codes I had read in 2020, has also "upscaled" his project to 3D in late 2024.
[2]: Fun exercise for those of you who love combinatorics: How many different voxel representations of the same three QR codes can be created at a given error limit? I don't think it's as trivial as it sounds.